Monday, January 30, 2012

great news leads to fun jewelry

I got some great news today! I entered a Valentine's Day Challenge by submitting a tutorial   "how-to make Crimson Heart Earrings" on instructables.com. (The voting is open until February 21, I would appreciate if you stopped by to vote for me.)
Well I was received a message yesterday saying my post became an editor's pick and I was awarded 3 months of "pro" membership access to the site. Just when I thought that was cool, I was contacted by the president of the site today notifying me that my post was chosen to be featured on the homepage and was awarded an additional year of "pro" membership access.

Well! I was so excited and inspired! I went right away to my crafting table and made 2 pairs of earrings.
I have always loved anything banana flavored! Now I have these awesome banana earrings
 and check out these goldfish earrings! you can't help but smile and maybe even sing when you see these
 thanks for the support!
till next time...
Chaz

Saturday, January 28, 2012

Fun in wire wrapping

Hello! Today I made a few wire wrapped things that I would like to share with you.

I had bought these beautiful aluminum flowers a while back. I made this pretty pink rose wire wrapped ring
 Using my Wubbers, I created these asymetrical wire wrapped beaded earrings. I love the icy blue beads!
 These flower pot earrings are some of my favorite to make using seed beads. You can change it up with so many different colors and different beads for the flower pot.
 And in the spirit of Valentine's Day being around the corner, I made thse dainty crimson heart wire wrapped earrings.
Today is one of my day's off from cooking meals for the family but I wanted to make a sauce to compliment the tilapia fillets that were being cooked up for dinner.
I am terrible at writing down recipes and am trying to remember exactly what went into the sauce. But it was very tasty and went so well with the fish!

Can't wait to see what tomorrow holds...
till then
Chaz


Thursday, January 26, 2012

Pine Cone Hedgies

I picked up a few baby pine cones from the ground the other day and knew just what to do with them!
A hedgehog would be perfect. So when i came home I made these beauties
 Meet Piney and Petey
 Everything is sculpted from polymer and the eyes are seed beads.
 Don't be afraid to use the natural resources around you. You never know what you can make.
We'll see what I pick up next time.
Till then...
Chaz

Wednesday, January 25, 2012

Dead Man's Party


I'm all dressed up with nowhere to go
Walkin' with a dead man over my shoulder

Waiting for an invitation to arrive
Goin' to a party where no one's still alive

I was struck by lighting
Walkin' down the street
I was hit by something last night in my sleep
It's a dead man's party
Who could ask for more
Everybody's comin', leave your body at the door
Leave your body and soul at the door . . .
(Don't run away it's only me)

All dressed up with nowhere to go
Walkin' with a dead man
Waitin' for an invitation to arrive
With a dead man . . . Dead Man . . .

Got my best suit and my tie
Shiny silver dollar on either eye
I hear the chauffeur comin' to the door
Says there's room for maybe just one more . . .

Don't run away it's only me
Don't be afraid of what you can't see
Don't run away it's only me . . .

Here is my homage to my favorite song by Oingo Boingo
These little guys are so versatile! They can become rings, earrings, magnets, hair clips... the possibilities are as endless as the imagination.
Really, who can ask for more?

Monday, January 23, 2012

Make a wish on these fish!

I started working on these goldfish this weekend. I am more than pleased with how they turned out! I was happy to use my new brush to get the detail work done.


In other news... I found my Airwalk sneakers torn to shreds! One is a sandal now.
 and here is the culprit! My black lab puppy Penny.
 It definitely was not my Australian Shepherd, Thea.

Now I better go make sure all my shoes are put away before bed.
Until next time...
Chaz


Sunday, January 22, 2012

What a Wonderful Weekend

Hi there! I had a great weekend. I was able to sleep in and had meals prepared for me for a change. I usally do all the cooking in my house but this weekend I was spoiled. With a full belly and extra time on my hands I went to creating.
i made these adorable peas in a pod earrings. you can't help but smile when you look at these.
 thinking of the holidays that are quickly approaching, i made these yummy chocolate bunny earrings. seeing these makes me feel like a kid again.
 i had previously made some snail earrings but they came out a bit too heavy for the average ear. so i was aiming at making smaller snails. these two came out more mischievous. i find that very fun! 

it always feels great to create!
i want to share with you a few of my favorite snacks that keep me going when i am in the zone...
this weekend  i happened upon this new shasta soda flavor: fiesta punch. it is made with two of my favorite flavors - watermelon and pineapple. mmm mmmm! 
 i got this coconut sparkling water while grocery shopping. coconut is another of my favorite flavors!
 red is my favorite kind of wine and i particularly like sangria. i am hoping to try and find some nice bottles when i am out and about next weekend. do you have any recommendations?

 until next time...
Chaz

Saturday, January 21, 2012

My New Micro Mark Mini Extra Fine Detail Brush

Today  I received a new toy in the mail. I ordered this detail brush to give me more precision and control painting details such as faces.
I am so overwhelmed with ideas of what to create right now. My goal is to make at least 1 new item a day. I will admit, I find it hard to stop crafting and have put in some late nights. My mind is constantly racing with the possibilities!
We'll see what tomorrow brings.
Until then...
Chaz


Friday, January 20, 2012

Buttered Waffles with Syrup Earrings - My first tutorial

I am excited to write my first tutorial! I want to share how i make my yummy waffle earrings with you.
First thing you do is roll out your clay to make it all the same thickness. Then take your waffle mold and stamp it over and over across the clay.
 Next take a razor blade and cut out the rectangle that will be your waffles.
 Time to color them. Scrape some yellow from chalk pastels and use a paintbrush to brush it over the waffles. To get just the right toasted color, scrape a bit of brown chalk pastel and use a paintbrush to get the color on the raised edges.
 Now it is time to butter your waffles! Roll out some yellow clay and use a razor to cut thin rectangles.
 From those rectangles cut little squares.
 Place 2 little butter squares randomly on your waffle. You may need to use a tool to pat it down firmly.
 Here are all my buttered waffles, waiting for the syrup to be poured right on.
 Before baking the clay waffles and before using the liquid clay, you will want to make and insert the eyepins that will connect the waffles to jump rings and earring posts.
 I use my Wubbers and 20g wire. Then stick the eyepin into the top center of each waffle best you can.
 I recommend baking the waffles at this point so they are hardened prior to the syrup process. It just makes it much easier to handle. Then take your translucent liquid clay. Here i use FIMO liquid deco gel. Pour a bit in a plastic spoon.
 Then get your chalk pastels and scrape a mix of colors to get your syrup hue. I used some light brown and orange.
 Mix it well so the color is even. Then drizzle the syrup over each waffle taking care to fill each nook.
 Bake the finished waffles. When they are cooled, secure eyepin to earring post with a jump ring. I added a clear seed bead for a fun touch.
 Wear them with pride!

Have fun and be creative. 
I would love to see how yours turn out!

until next time...
Chaz

Wednesday, January 18, 2012

Manly rings

The other night I saw "Making Monsters" for the first time. It was the episode where they had an order for aliens and a UFO for the Roswell Museum. It was so amazing to see the artist sculpting on a bigger scale and using some of the same tools and products as myself. I was so inspired!

I have a friend who likes all things sci-fi. I decided to take a stab at my own little alien. I made a ring I know he would still feel "manly" wearing.
He also likes Day of the Dead themes so I made this Dia de Los Muertos skull ring. I love the way the ruby red eyes pop!
 Best part is it glows in the dark!


He was suprised and did like both rings.
I am always on the lookout for new challenges and new sources of inspiration!

Let's see what inspires me next...

until then,
Chaz

Sunday, January 15, 2012

my first love! wire wrapped rings

Hello again!
I started making wire wrapped rings when I first began my journey into jewelry. I was amazed at my ability to manipulate wire and add beautiful glass beads to create these fun rings.

I began playing with different wire gauges and colors as well as adding seed beads. I have a blast making these and hope you enjoy the few I will showcase in this post.

This is my starburst heart
 I enjoy the green on green in this emerald bead ring
 Look in to the glass bead... do you see the koi fish?
 This style ring is my "nest". I used red wire with a glass bead that is blue on one side and red on the other. You can roll the bead to suit your mood and outfit.
 This nest ring has a gorgeous pink crackle glass bead. It is so nice when it catches the light.
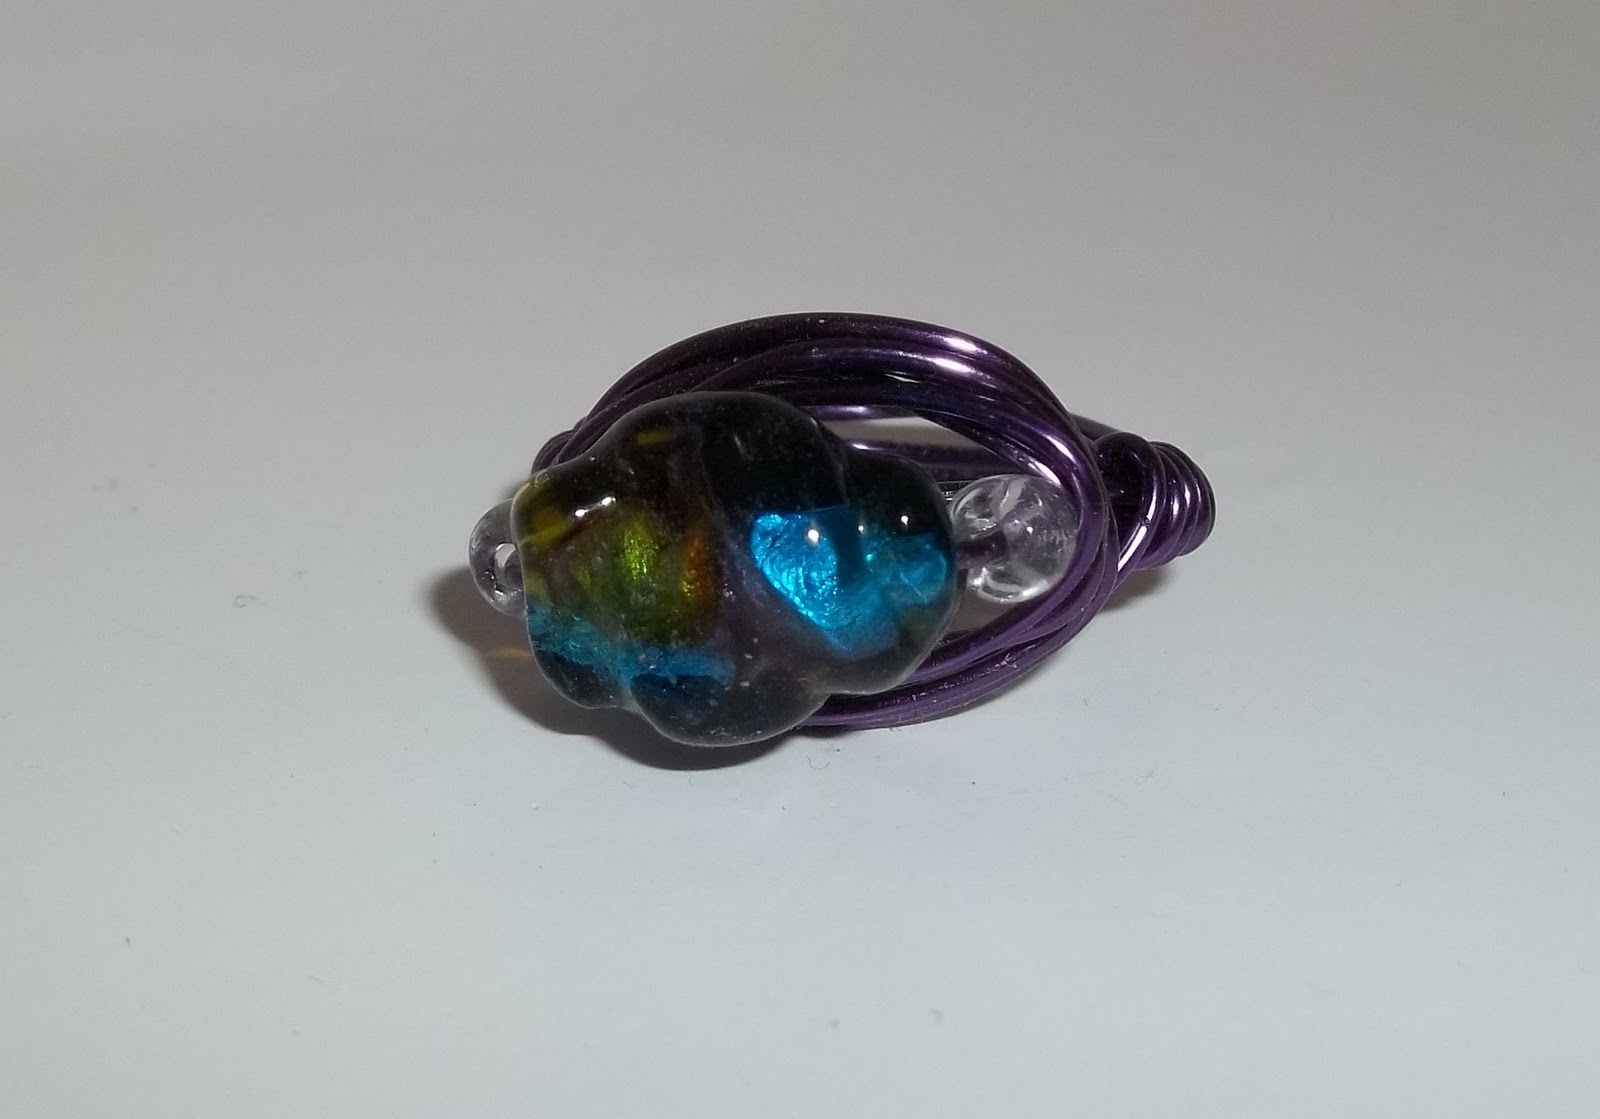
 when i look at this ring I think of a meteorite falling from the sky and catching all the beautiful colors as it burns.
 And here's a shot focusing on the bead.
 I call this style the spiral ring. It takes a flat glass bead to showcase the wire spiral.
 I used a wood bead resting on a thin silver disk when designing this spiral.
 I love how this crackle bead looks electrified
 This was the first ring i made using copper wire and I am more than pleased with how it came together so nicely with this tiger striped bead.
 This bead is double sided blue and silver. Again you can turn it to match your mood and outfit.
 I love the way the purple center on the blue seed beads pops in this ring.
 Yeehaw! This is my cowgirl ring with a dainty pink seed bead.
 I  made this while searching for the best way to make an adjustable ring.
 This blue on blue spiral can be hypnotizing.
 The bead on this nest ring is silver with one leopard spot.
 This pink on pink spiral ring is such a rose!
 I fell in to a burning ring of fire.
 I used 3 seed beads on each side of this one. I like the bubbles in the center bead.
 And last but not least, this ring is a bit of a monster. I designed it for my niece based on a skirt she had made of the same color diagonal stripes


I am always on the look out for fun and different beads to use as my focal points. I love each and every one.

Until next time...
Chaz